
Can you believe it? We’re already at Part 3 of the Drawing Anime Eyes series and today we’re going to take a look at the amazingly popular eye of Edward Elric from Fullmetal Alchemist: Brotherhood. Did you guess the eye? Whenever I ask my friends and followers on Facebook which Anime series is their favorite I find that Fullmetal Alchemist: Brotherhood is a huge fan favorite!
When I started the tutorials for drawing anime eyes I started out with Edward’s eye after he captured my attention while I was watching Brotherhood. I find that if you want to draw Anime then watching Anime is a great place to start. While it won’t give you everything you need to be consistently good at drawing Anime characters it will certainly inspire you and you’ll see improvement by simply paying close attention to the character details.
Let’s take a quick recap at what we’ve seen so far in the series. Firstly in Part 1 we took a look at the eye of Eren Yeager, from Attack on Titan, and in Part 2 we looked at the female eye of Sakura Haruno from Naruto. If you haven’t seen them make sure you catch up as each tutorial tries to teach you in a slightly different method. Just remember that if you want to gain access to the Drawing Anime Eyes Photoshop, and see exactly how I created it, you can sign up to the free Toons Anime Manga newsletter and get access to the Ultimate Digital Art Starter Kit.
[hero heading=”Join ToonsAnimeManga (It’s Free) ” tagline=”Sign up and get access to the ultimate cartoon and manga starter kit, including the Drawing Anime Eye Photoshop File, and get free Blog updates too.”][modal heading=”Join ToonsAnimeManga (It’s Free)” text=”I’m In” size=”btn-large” variation=”btn-danger”][/modal][/hero]
The Highlight Reel
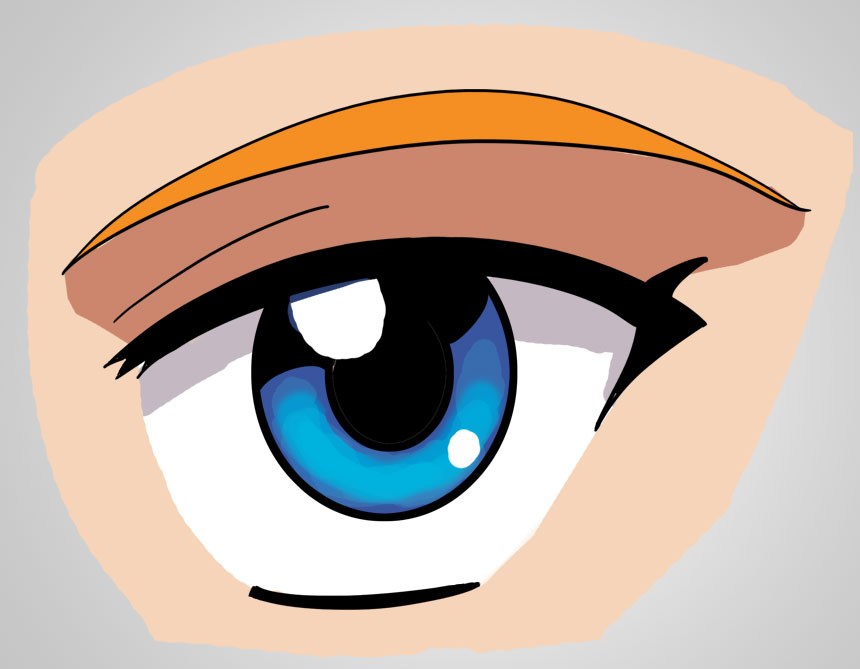
How to Draw the Edward Elric Eye
Fullmetal Alchemist: Brotherhood
Sketch
Sketch Lines
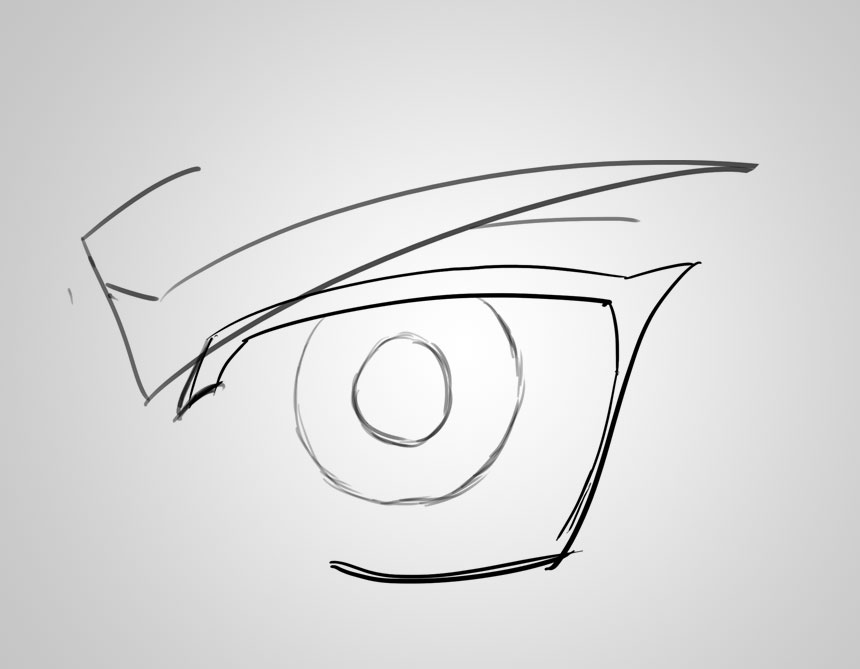
Once again I found a reference image of Edward’s eye and created a rough sketch of what the eye will look like. I’m really just keeping my lines as loose as possible while making them clean enough to ink in the second stage.
Again there isn’t much to the sketching part of things just make sure you get the shapes correct and check that your eye looks similar to your reference image.
For those of you who are unaware of how to adjust the brush settings within Photoshop I thought I’d expand on that a little further. In both Part 1 and Part 2 we spoke about a number of brush settings and unless you can find the section within Photoshop you may not understand what I mean.
Also I’d like to understand whether you use photoshop or if I should include other applications in my tutorials too? Make sure you comment below on your thoughts.
Brush Settings
Depending on which version of Photoshop you have, the icon to bring up the menu might be in slightly different places. Personally I’m using Photoshop CC which is the latest but don’t stress if you’re using an older version of Photoshop. Brush settings have been in Photoshop for a significant period of time so you should see the panel regardless of version. If you want to bring it up go to Window – > Brush and the settings will pop up.


You’ll notice in the above images that there is a little padlock on the right hand side of each of the brush settings. The padlock allows you to lock your brush settings so that regardless of which brush tip you choose your settings will remain the same. I typically lock the “Transfer” setting as I was having issues with “Transfer” switching back on, when I changed brush tips, and this was causing issues while inking and coloring. If you’re looking for some more detail on brush settings then you can check out the following guide here.
Ink
Ink Lines
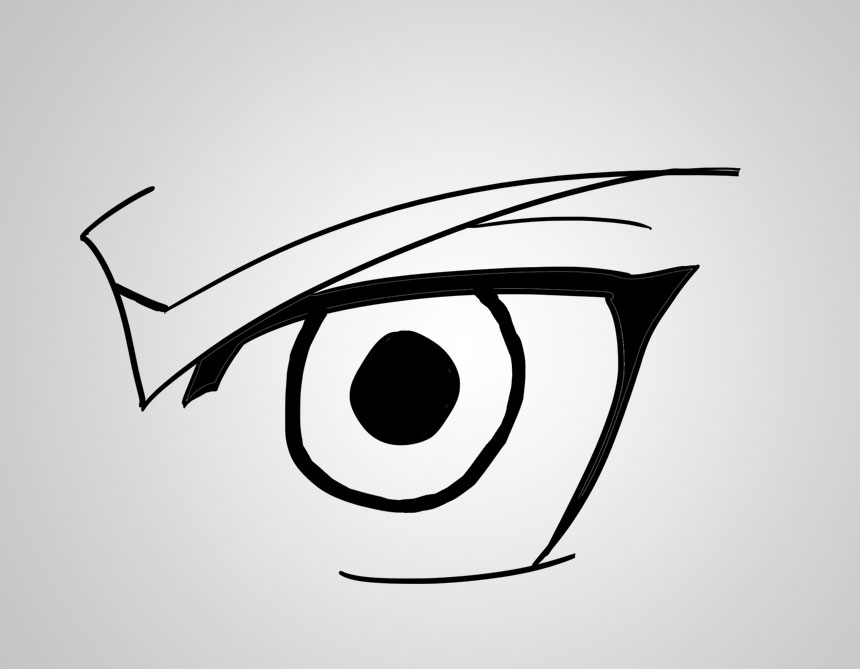
Once again I used the freehand method for inking in preference of the pen tool. You’ll notice however that the Iris and Pupil were inked free hand and they’re slightly unclean in appearance. This particular eye of Edward was the first eye that I drew and in later drawings I decided that I preferred to use the ellipse tool to get a clean and crisp circle for the Iris.
If you created this eye at a really high resolution and end up resizing then you’d also notice that the lines will look cleaner at lower resolutions. As we are zoomed in on the lines you’ll notice that the ink lines are fairly shaky. Freehand inking of circular shapes can be tough and typically takes some practice as it’s hard to gain any real flow.
I’ll just keep practicing and no doubt get better each time I do it. Once again your lines don’t need to be perfect because when they’re colored they won’t be as noticeable.
Flat Colors
Flat Colors
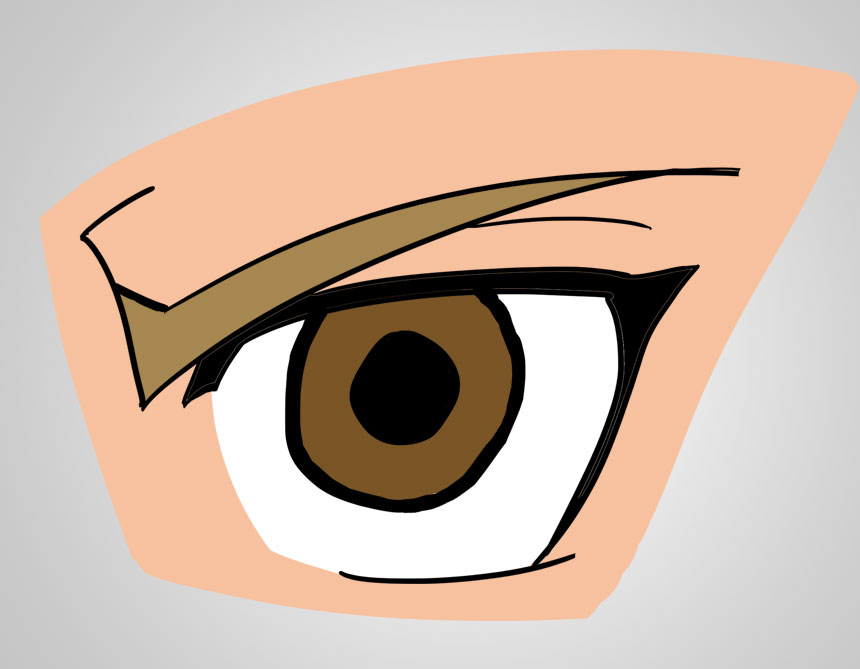
In Part 1 and Part 2 of the Drawing Anime Eyes series we spoke about using the magic wand tool to select areas that are full enclosed by your black ink lines. In this case we only have two areas that are full enclosed by black ink which is the Iris and the Eyebrow.
So again, on your ink layer, select the magic wand tool and select the Iris. Once you have the Iris selected go to Select -> modify -> expand and expand by 3px. Once you’ve expanded, create a new layer and fill the area with the desired color.
Repeat the process for the eyebrow and then create new layers for the remaining colors. Use a hard brush with the “Transfer” brush setting switched off for the final coloring. If you want to match your colors with mine you can use the following
Skin (f7c19f) Iris (7a5526) Eyebrow (a78751)
Shadows
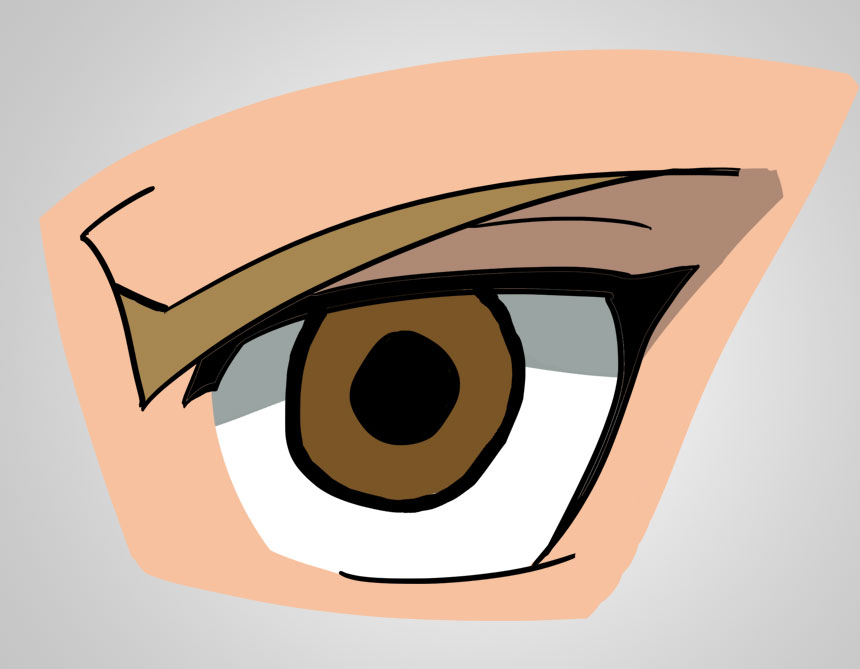
Add Shadows
In Part 2 I spoke about three different methods for shading and in this tutorial we will be using the second method. Since Part 2 was posted a reader kindly reported that this method should be called the Clipping Mask method.
Create a new layer above the white eye layer. Once you’ve created the layers we need to link them together. Hover your mouse between the white eye layer and the new layer and hold the ALT key. You should see the pointer change to a downward arrow and when it does left click your mouse and you’ll see your layer indent. It should look something like this in your layer panel.
Link Layers and Coloring Lines
My friend, Donnie Ray Crisp, from Illustration Overdose taught me how to link layers over at his YouTube channel. So if you guys want to learn more or see this in action then check out the following video for further detail. Make sure you say thanks and subscribe to his channel if you like his video.
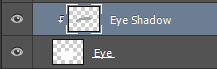
Lower Highlight
Lower Highlight
Moving onto the lower highlight it’s pretty simple in this instance. I used a soft brush at around 110px in size but this may vary depending how big you’ve drawn your eye and your canvas settings too.
Once you’ve got your brush selected, create a new layer on top of the Iris layer. You can choose to link it if you want as you don’t want your coloring to go outside of the Flat color for the Iris.
Then it’s a simple as adding in the color, mine was d99b44 if you’d like to use it as a reference. Again you can play with the opacity settings of your brush if you want to blend the base color with your highlight however in the reference image I used I decided that I would not use any additional blending for Edward’s eye.
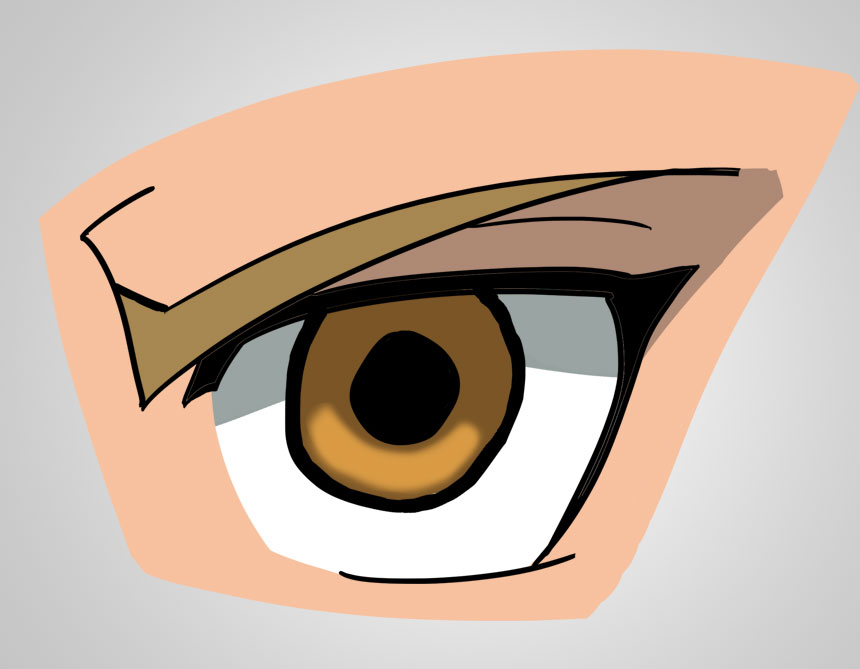
Final Highlight
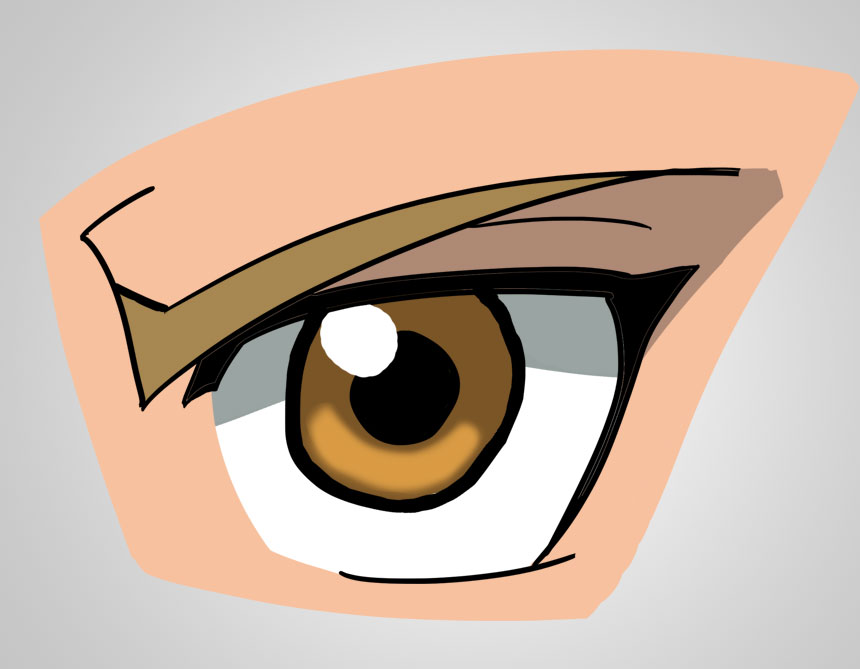
Highlight
Now for the final step to create the magical final highlight by adding a white dot onto the Iris and Pupil. Again you can create a new layer for this or you might choose to add it to one of your already existing layers.
Simply grab a hard brush and circle in the dot as white. There you have it you’ve now created the Edward Elric eye from Fullmetal Alchemist: Brotherhood. It’s pretty simple but you can see from adding a few areas such as shadows and highlights the eye quickly comes to life.
Again this was the first eye that I created and the outline of the Iris is fairly messy . However I feel that once it’s colored it is not nearly as noticeable. So my advice to other beginners out there is to not be so hard on yourself when it comes to inking perfect lines. The coloring can make it less noticeable especially if you follow videos such as the Illustration Overdose video and color your lines.
Coloring lines for eyes typically doesn’t occur, in my experience, however for areas of the body it’s common practice to color your lines. Once you’ve colored your lines and blended it with your flat colors you’ll find that any mistakes you make are even less noticeable.
Consider Yourself a Pro yet?..
If you’ve made it all the way through to Part 3 of the Drawing Anime Eyes series then you should consider yourself a Pro! Well maybe we aren’t quite pro’s yet but we’ve certainly come along way from when we started this journey. Recently this week on Facebook and Twitter I posted an awesome example of my improvement since I began drawing midway through this year. Sometimes you need to look back into the past before you can understand how far you’ve come. If you’ve got any questions then please ask them in the comments below or if you just want to say hi then make sure you get involved and make this site as interactive as we can.
The final thing I wanted to say was that once you’ve draw the eye once and perfected it you should then try to cement that eye into your memory by practicing it over and over again. Don’t just try one eye but instead make sure you can create many different eyes and styles. You need to continue to practice, by drawing them over and over again, before you can consider yourself a professional. This will also help you out when creating your own characters because you’ll be able to choose from many different eyes that you’ve practiced over time.
Who Is The Final Eye?
nice one Byron keep it up!
Thanks mate, appreciate your comments on the blog post!
i thank you and the finale eye is Alphonse elric.