
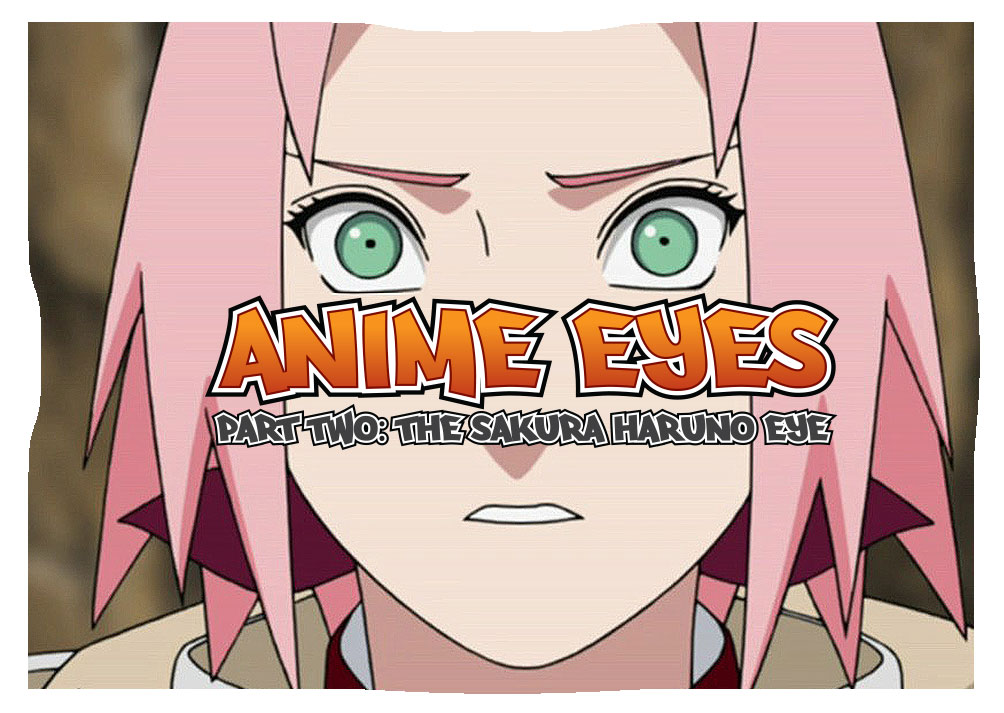
It’s time for Part 2 of my Drawing Anime Eyes series! Did you correctly guess the character that this eye belonged to? It’s the very loved character of Sakura Haruno from Naruto. You guys are smart and I know you’re rolling your eyes saying “of course it is!“. Let’s do a quick recap and just in case you missed out on Part 1 make sure you check out Drawing Anime Eyes Part 1: The Eye of Eren Yeager Eye before moving into this tutorial. I will try and discuss things in a slightly different format in part 2, to keep things fresh, and hopefully if you didn’t understand something in the first part I can clarify for you in Part 2.
I’m really excited about Part 2 today because we get to focus on a Female Anime eye. Like any part of the anatomy when it comes to drawing anime eyes it’s important to know the subtle differences that determine how we interpret the character. As you’ll see through the following tutorial the female eye may contains lashes, has strong curves and you’ll also find the eyebrows are thinner when compared to the male eye.
Part 1 Follow Up
The second area that I’d like to clarify from Part 1 is the canvas settings that I spoke about . I had a number of people query why I was using such a huge resolution for my canvas and that it seemed like it was overkill for what I was drawing. In fact they were right and I don’t disagree at all. I wanted to make sure I clarified in this post and to avoid any confusion. You can still have great results by selecting a much smaller canvas sizes and I recommend you doing so if you’re machine struggles on higher resolutions.
The main point I wanted you to take away is to draw in a high resolution which will improve your lines. You should see cleaner and smoother lines as a result, especially when you reduce the image for the web or other media. This is a tip that I’ve been given by a number of professionals in the industry and I can definitely see the difference with my own work.
I am on this journey with you guys and I don’t want to sound like an expert by any means. My aim is to improve my own skills but more importantly I want to improve yours too. All I can do is provide you with every inch of information in my head and the sooner we can all achieve amazing things. Together we’re learning but it’s great to hear others opinions about how they work and what they feel are more appropriate settings. Make sure you comment below in regards to your opinions.
So, let’s get started. I thought I’d kick this Part 2 of drawing anime eyes with a brief highlights reel of Sakura Haruno, just in case you needed a reminder. You’ll see a few shots of her eyes and what they are like so come on, let’s do this!
The Highlight Reel
How to Draw the Sakura Haruno Eye
Naruto
Sketch
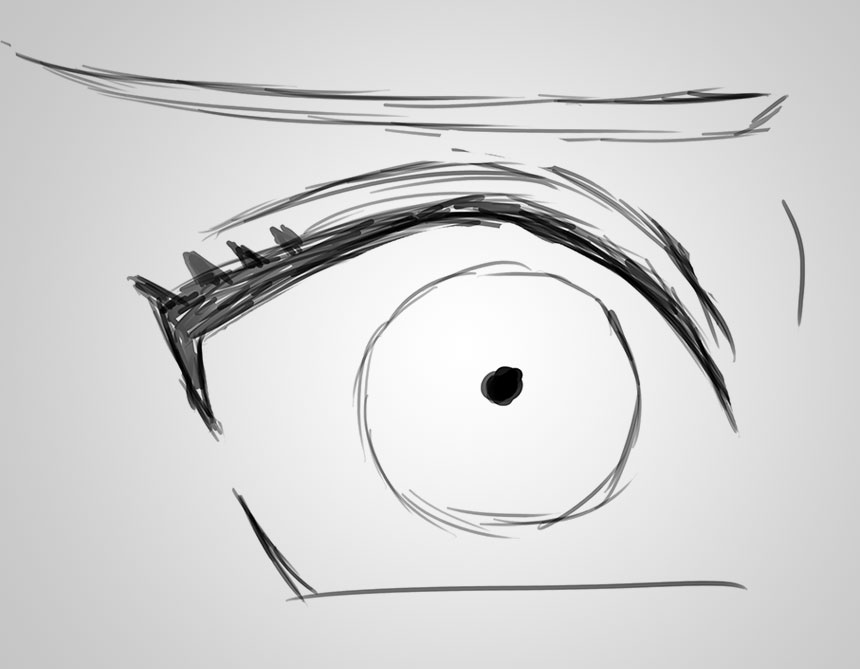
Sakura Haruno Sketch
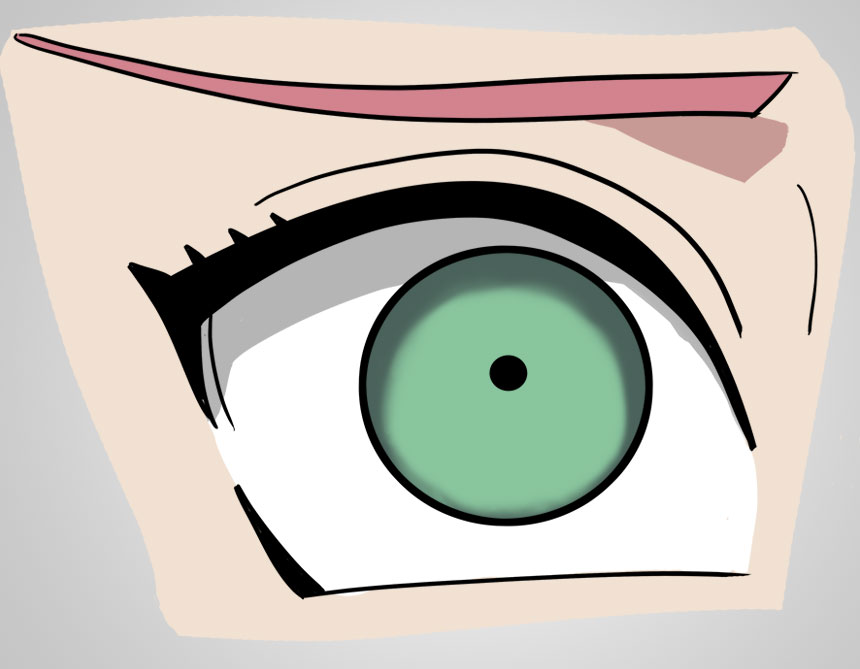
Sakura’s eye is fairly simple and in fact there isn’t a huge amount of steps that you’re going to need to reproduce this eye. This eye in some ways is almost a reverse of the Eren Yeager eye. Instead this eye features a heavy curve but we find it on the top eyelid instead of the bottom.
You’ll notice that there are some spikes, on the left hand side, to indicate the eyebrows. This is away of stylizing the lashes of the female eye and is one of the ways of differentiating between a woman and a male eye. The eyebrow of Sakura is thin which again is a great way of showing that we’re dealing with a female eye.
These subtle modifications to features make a big difference in the character we create. If you want to see this in action you can create a few eyes and play around with lashes, the shape of the eye and the size of the eyebrow and see how that affects your thoughts on whether the eye is male or female
Ink
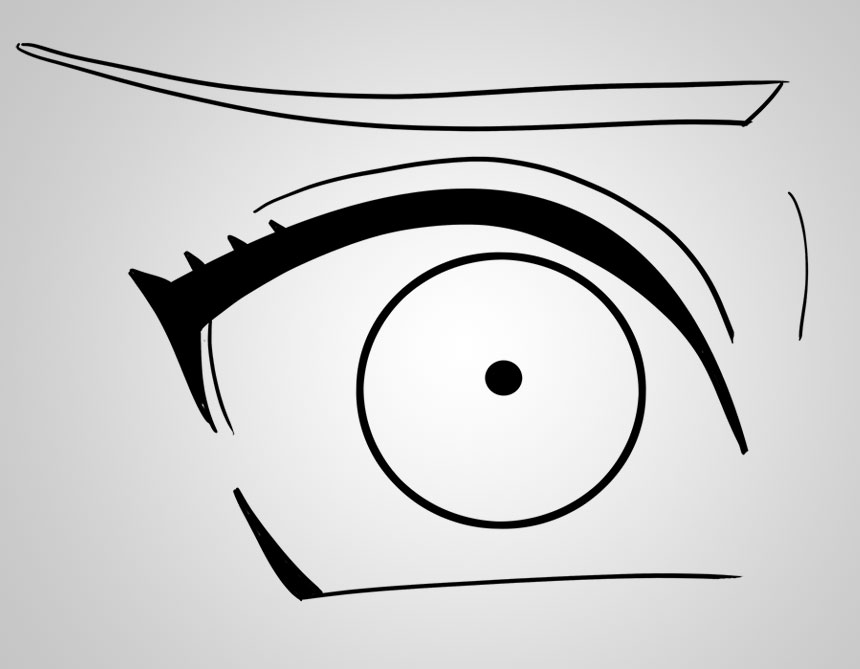
Sakura Haruno Sketch
The second step is to ink our original sketch. I wanted to expand on my process from Part 1 and document this a little bit more, generally my process is this:
- Create a new layer on top of the sketch layer and rename it to Ink
- Reduce the opacity of the sketch layer to 30% (whatever works for you so that it fades your sketch)
- Select a hard brush and ensure that “Transfer” is unselected in the brush settings
Now when it comes to creating free hand ink lines I’m no master, I can assure you of that. My advice, to beginners, for free hand inking is to simply not be afraid . I’ve found that it’s best to firmly press down with your digital pen and don’t worry if you need to have a number of attempts before you get the line just right.
Create a nice fluid movement of your hand and try to ensure that you connect your lines (where necessary). For areas such as the black eye lids focus on drawing the outline first and ensure there are no gaps in your lines. Once you’ve created the outline you can simply fill the space with black.
Again it’s the same process with the eye lashes. Create the smooth eye lid curves first, in one continuous line, and then go back and add the lashes over the top. If you try to ink your lines around the lashes then you may find that your line work suffers and ends up dirty and lose the flow. I’ve really found that you should try to be confident as a beginner and even if you have to redo the line twenty times to get it right then that’s totally OK. It’s not a race!
With practice you’ll get much better and it will be faster than using the Pen Tool, which will drive you crazy depending on the level of detail your artwork may have. The Pen Tool has its purpose but it can be time consuming too!
Flat Colors
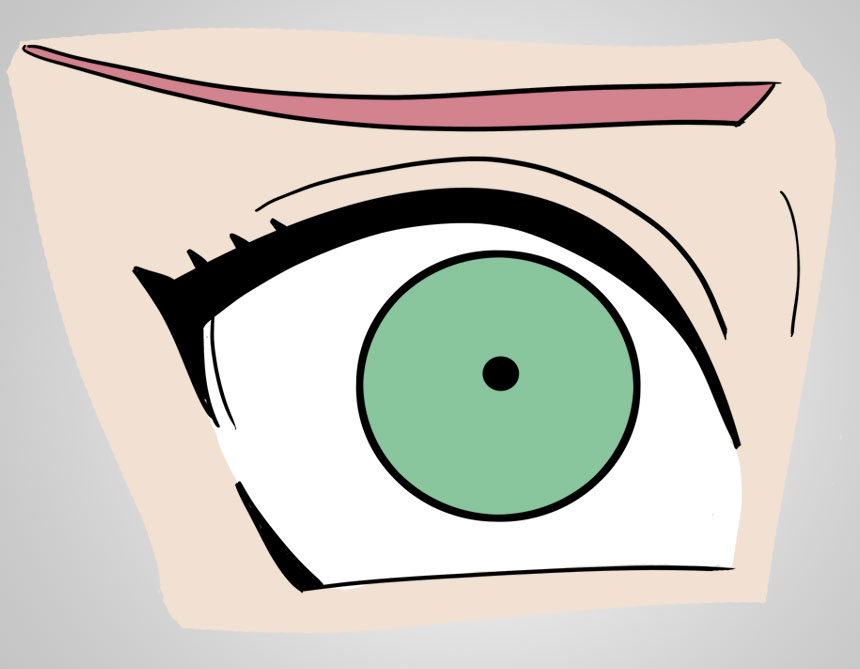
Sakura Haruno Flat Colors
Again I created individual layers for each of my colors, as I did in Part 1, because I wanted the flexibility to go back and show you guys each step. In saying that the general process is as follows:
- Select your Ink Layer
- Select the Magic Wand tool
- Select the area you want to color such as the pupil
- Create a new layer and call it Flat Colors
- Make sure you still have the original selection from the Magic Wand selection
- In Photoshop go to Select -> Modify -> Expand and expand by 3px. This ensures that you don’t have any white gaps between your color and ink lines.
- Select the color you want and then use the paint bucket tool to fill the selected area.
Repeat that process for any areas that are fully enclosed. By fully enclosed I mean areas such as such as the pupil and eyebrow which has a solid black line around the entire shape. For any areas that aren’t fully enclosed, such as the white part of the eye or the skin, then you’ll need to color the area manually. You could also use something such as the Lasso tool to trace out a quick shape before filling it with the desired color.
Shadows
Sakura Haruno Shadows
I’d like to explain a few different methods for shading over you base color. I have three methods that you can try out.
First method
- Create a new layer on top of your flat color layer
- With the magic wand tool select the color area you wish to shadow
- Now that you have the shape selected any coloring you add will only affect inside the selection
Second method
- Create a new layer on top of your flat color
- Hold the Alt key and hover between the two layers and you’ll see your mouse pointer change to a square with a downward arrow. When you see this left click the mouse and it will link the layer. You’ll know it’s work because your layer will indent. Any changes you make on the new layer will only show where there is color on the layer beneath.
Third Method
- At the very top of the layer window you’ll see the following icons

- As you can see I’ve selected the grid based icon which stands for ‘Lock Transparent Pixels‘
- If you check this option, for the layer that holds your flat color, it means that you can apply shading, on the same layer, but only to the areas that are not transparent.
- In other words it means that any areas that are transparent (ie. are empty) will be locked and you’ll be unable to make any changes to them.
- Again this has the same affect as the three methods above.
So there you have it, now you have three different methods for applying any kind of shadow or highlight. My preference is typically a combination of both the first and second methods as I like to have my shadows and highlights on different layers. If I don’t like the shading in particular areas, and I want to go back and change it, then I have the freedom of having them on separate layers.
Highlight
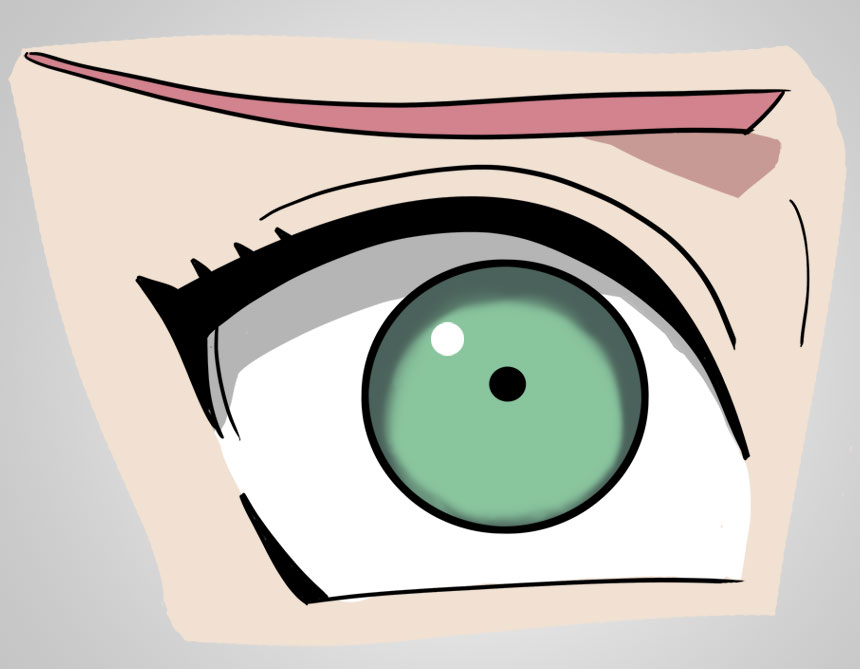
Sakura Haruno Highlight
The final step, which I actually missed in my original artwork, is the oh so critical white highlight on the eye. I’m sure you guys spotted my mistake and know how to add that into your artwork already.
I have noticed in some different images that Sakura also has the lower highlight that Eren has in Part 1. In my particular reference image of Sakura she did not have this. If you wanted to put that in however then it’s a good opportunity to test out your new found skills from Part 1 and try to add the lower highlight again. I’d love to see your results in the comments below.
If you do so then you’ll want to ensure that you’re using a brush with a softer edge so that the colors will blend with each other.
Two Down and Two To Go..
So there you have it we’ve now been through two different eyes and you should be getting pretty familiar with the process of drawing anime eyes. In theory this type of workflow can be used on all areas of your character and it doesn’t just apply to the process of drawing anime eyes. I’m really keen to hear the issues you’re having so that I can address that in the final two eyes.
Do you have any tips or feedback on drawing anime eyes? What works for you?
Receive Free Stuff
Don’t forget to sign up to the free ToonsAnimeManga newletter. You’ll get access to the Ultimate Beginners Cartoon Starter kit which includes the Photoshop file for this tutorial. In the future you’ll also get access to member based bonus content that isn’t offered on the site. The starter kit is the perfect kickstarter you need to level up your artwork and dive straight into creating your own cartoons and manga.
[hero heading=”Join ToonsAnimeManga (It’s Free) ” tagline=”Sign up and get access to the ultimate cartoon and manga starter kit including the Anime Eye Photoshop File, and get free Blog updates too.”][modal heading=”Join ToonsAnimeManga (It’s Free)” text=”I’m In” size=”btn-large” variation=”btn-danger”][/modal][/hero]
[…] Drawing Anime Eyes – Part 2: Sakura Haruno […]
[…] How To Draw Anime Eyes: Part 2 – The Eye of Sakuna Haruno […]
the subscribtion to your site by email to get good files didn’t work sadly.
so can u subscribe me automatcally or fix that issue?
I received your subscription Eliahu so it looks like everything worked. You should receive an email with a link to download the files. Please check your inbox and the spam folder too and see if you have received anything. If you haven’t received it I can send it through manually to you.