
Phwooaa! Let me grab a seat for a second guys, I need to catch my breath. Let me tell you, I’ve been busy lately, really busy. To be honest though its the kind of awesome busy that everybody wants when you’re frantically involved with learning something new, especially when you LOVE it! I’m working hard to level-up my own cartoons, digital drawing and trying to draw a few hours every day, so I can hopefully come back and teach you guys something too.
I’ve also been tackling a redesign of the website in preparation for some killer content coming your way. I wasn’t happy with the original design, just between you and I, but this one looks [tooltip text=”BLOODY AWESOME!” placement=”top”]pretty neat[/tooltip], what do you guys think of the new look?
A number of times recently I mentioned to you guys about my fanatic excitement for anything Teenage Mutant Ninja Turtles. Last week was no different as I found myself once again inspired to create a digital drawing of a a [tooltip text=”I promise to draw other things too!” placement=”top”]Ninja Turtle[/tooltip], this time it was Raphael. I love asking people which Teenage Mutant Ninja Turtle they’d be because I think everybody can align with one of them. They all have such unique personalities but I think there is a bit of turtle in all of us.
What about me? Well I think I’m closest to Raphael and that’s exactly who I chose to draw this week! This tutorial will need some level of understanding of Photoshop as it’s more about my workflow than it is an in-depth technical guide, but I hope you’ll gain some of that too. Let me know in the comments below which Turtle you think you’d be and why, I’d love to hear.
Video
My aim is eventually to have my own YouTube channel, in fact I already have videos on YouTube but at this point I’m not necessarily classifying it as a “channel” until I can provide something valuable to you guys. I did however create a rough video of my digital drawing sketch process which fits perfectly for this particular post. So without further delay press play on the video below and feel free to subscribe to my channel while you’re there.
Sketch Phase
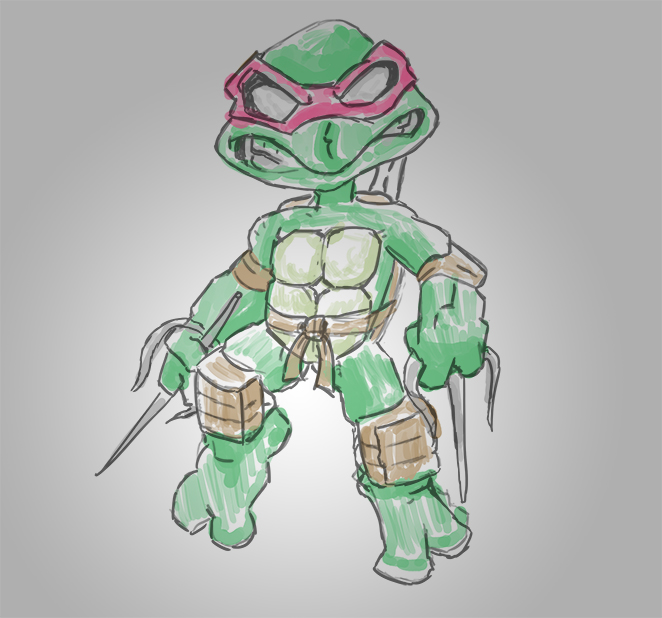
Rough Digital Sketch
At the end of the video I have a digital drawing that looks like the image shown. It’s really rough and sketchy, as you can tell, but all I’m trying to do is get my idea on paper while ensuring I’ve got the perspective and anatomy looking correct. Once I’ve got this down I can use it as my base to go over the lines in the inking phase.
Really guys, perspective is key. You need to remember that your characters have depth to them and imagine them as squares, spheres and cylinders. In terms of Raphael you’ll notice that the viewing angle is slightly to the right which means we’ll see more of the depth on the right side (his left) than we will on the left.
You’ll notice that because of that perspective his left hand side arm, in the image (actually his right), is drawn behind his chest. This is perspective coming into play again and it’s little things like that which can make the world of difference to your drawings.
Inking Phase
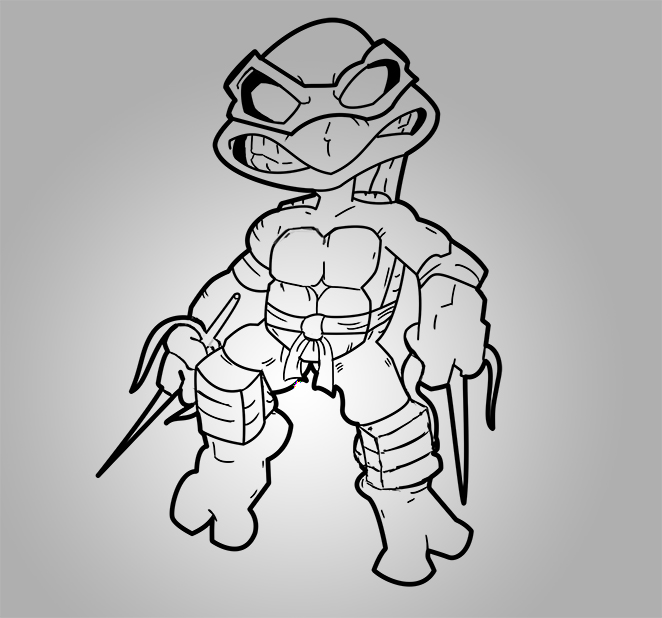
Cleaned Lines After Ink Phase
Moving onto the Ink phase we’re only worried about cleaning up our lines. We may make some adjustments to the lines we have from the sketch phase, just to make it look more appealing, but overall we’re only concerned with making the lines clear and clean.
If you have a Wacom you can freehand your Ink lines, as I did for Astro Boy, but this is going to take some serious practice and I sure as hell haven’t mastered it (yet). The aim is to select a hard brush, ensuring you’ve deselected the Transfer option in the brush settings, then trace over your lines creating a solid black outline.
In this instance however I used the pen tool. I don’t want to get into the details on how to use the pen tool in this instance, as there have been plenty of tutorials on it already, really you just need to get in and start using it. My general process is to trace around the outline of the character first and I’ll ink that line in a thicker brush. This is key in the inking phase, vary your line weights. It makes the world of difference to your finished product.
Coloring Phase
Flat Colors To Get Started
Once you have your clean lines you’ll need to create new layers beneath your Ink lines for each of the different colors and body areas. I typically start with the color, and body area, that takes up the majority of the character. In this case it’s the skin. Also note that I’ve covered this previously in greater detail in the Astro Boy tutorial.
Using the Magic Wand tool, holding the shift key, I click on each of the areas that are skin. Then leave those areas selected and create a new layer. Go to the menu Select -> Modify -> Expand and then expand the area by 3 pixels. This will ensure we don’t have any white space between our lines and our color fill. On your new layer select the color you wish to use and using the Paint Bucket tool fill the selection with your Color.
Repeat this process by selecting your Line Ink layer, deselecting the current selection, and selecting the next color area. Don’t forget to expand your selection and to apply your color on individual layers.
Highlights
Shadows
Apply The Shadows
The first thing you want to do is to add more depth to your character. You do that by adding in the shadow to appropriate areas. To do this you want to create a new layer on top of the skin layer you created earlier and rename it to Shadows.
When it comes to coloring sections of your character is a good thing to select multiple Layers and then group them together using Control-G. This will create a folder in your layers list and allow you to show or hide all layers within that group.
Once you have your new layer and group ready, go back to your original Link Ink layer, select the skin as you did in the coloring phase and then go back to your shadows layer. This allows us to modify only the color within the selection and means our color won’t go outside of the ink lines.
Pick a darker green, and a soft brush, and you may need to expand the brush to something larger. Make sure you still have the skin selected and start coloring in the shadow areas. When you’re finished it might look something like the image shown.
Highlights
Apply the Highlights
The second step is to create a new layer again, within your Layer Group, but this time name it Highlights. In this instance I changed the layer mode to “Linear Light” to try to give my color a bit more glow.
Hopefully you still have the skin area selected using the magic wand. On your new layer start applying the lighter coloring to the required areas. In my case I like to use a soft brush and use it outside of the selection to try to blend the color better. What this does is helps the brush bleed into the selection rather than applying it right over the top.
Just play around with your brushes and blending options and see what you come up with. I’m no expert at this and am still playing around with it too. The more you play with it the better you’ll understand what each blend mode does.
Reflected Light
Apply Reflected Light
The final stage of the highlights is to add the reflected light. Actually looking back there isn’t a huge difference for me between this stage and my previous one. I probably should have added a harder white edging light which might have made a stronger impact.
Again create a final layer in your Layer Grouping and called it reflected light. Ensure that you still have your skin area selected by using the magic wand on your Ink layer.
Start applying a fine white light to the very edge of your character and any other areas that you feel could use the pop. Areas such as the tip or the edge of the nose are where the light is the brightest so you may wish to add some there too.
Once you’ve finished this process its time to start it again but with the other areas that you still need to color. All i’ve shown you here is the skin layer.
Final Touches
When you’ve inked and colored your image it really just comes down to polishing off your final product. It’s really important to add something additional to jazz up your design. This is how you make a good character look great. My process was as follows
- Create a new layer and add a Radial Gradient using White & Grey
- Create a new layer and download a splatter and drip brush. Use brush in different colors and sizes
- Add a pattern overlay to the spatter layer
- Create a new layer with layer Color Burn as blending option. Use darker soft brush around Raphael
- Switch splatter layer to Lighten Blend mode.
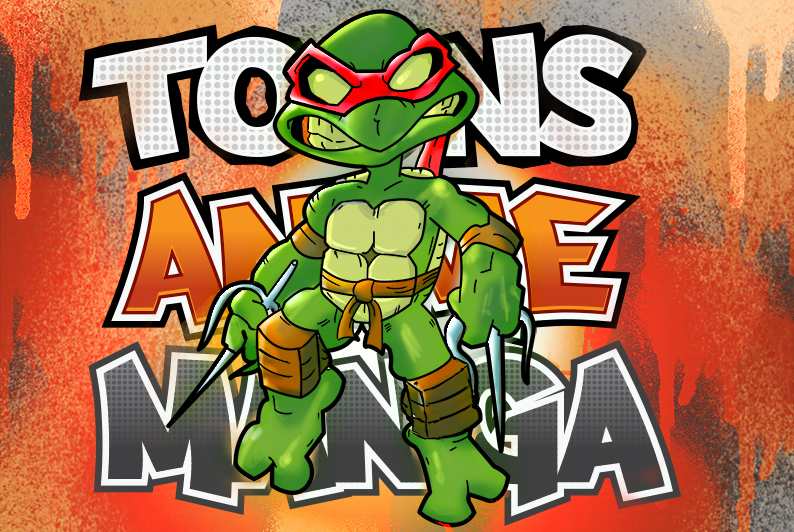
- Add the ToonsAnimeManga logo and we’re done here
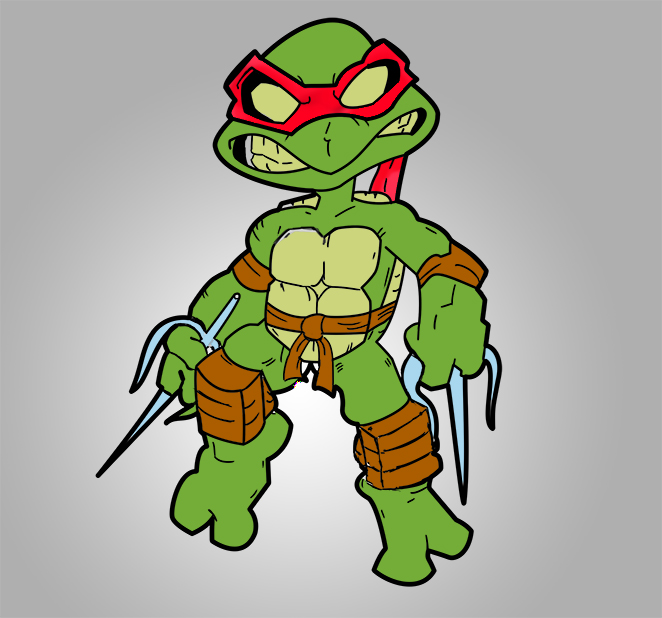
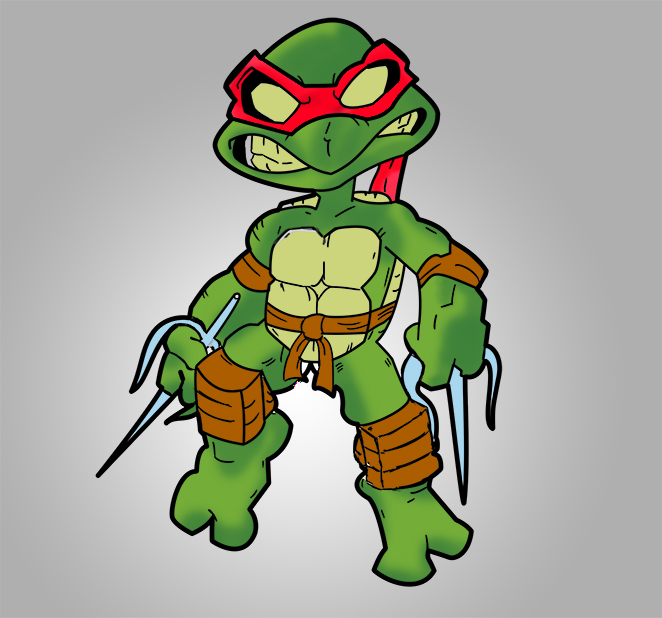
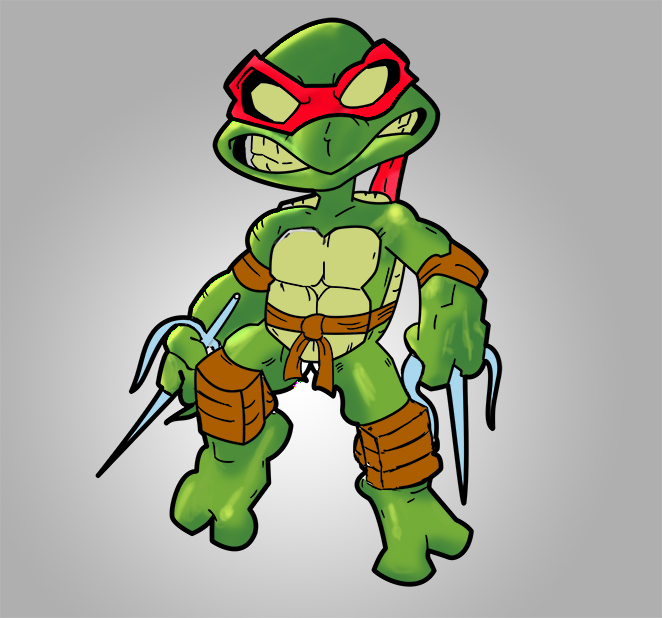
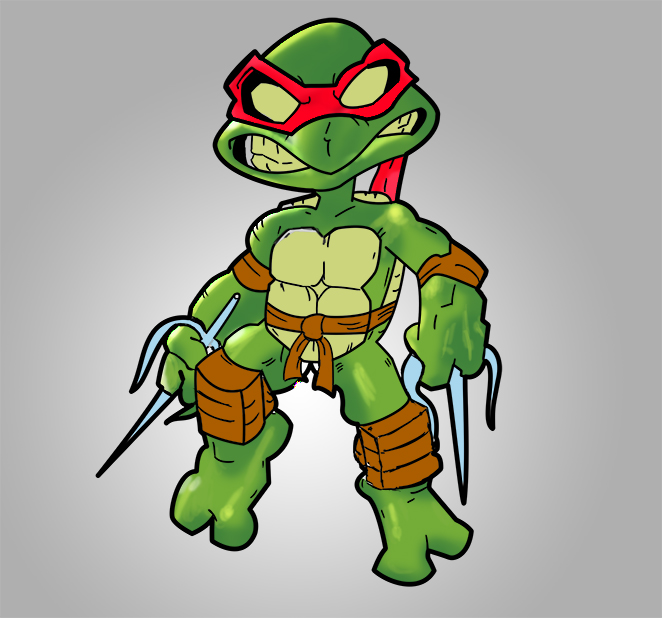
Heroes In a Half Shell
So there you have it guys I hope you can take something away from this and use it in your own drawings.This is some of my best work to date and I’m really impressed with how it finished up.If you have any suggestions on how I can improve or things to try differently please leave them in the comments below.
Again, leave me a comment below letting me know which Turtle you feel you would be and why and at the same time any questions you might have on my process.
Don’t forget to drop ‘Like’ the Facebook Page and follow me on Twitter
Finally, put your feet up and let’s head back in time, just for a moment. This is what I’m talkin’ about!
in 1994, the intro was changed to red sky theme:
oops, this one is correct: